Subdomain Configuration
- /
- /
- /
Subdomain Configuration
STSBuilder must run on a domain with wilcard subdomain supported.
If your domain is managed by Namecheap.com, please follow these steps
-
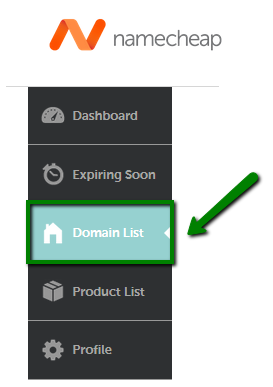
- Sign in to your Namecheap account
- Mouse over Account option in upper right corner of the page and choose Domain
- List or choose Domain List menu in the bar on your left

-
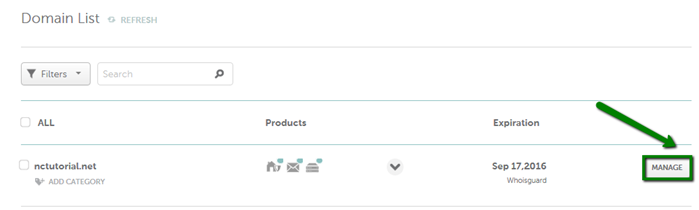
- Click on Manage option in front of the domain name you would like to create the wildcard subdomain for
-
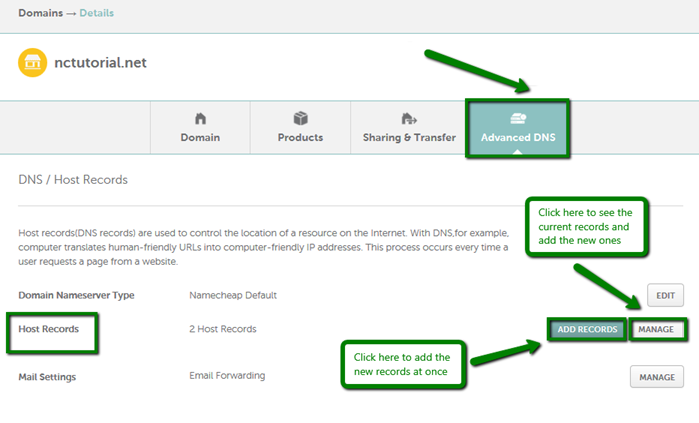
- Choose Advanced DNS from the top menu and click on Manage in front of Host Records option
- On the next page you may add or edit host records for a domain or subdomains. Click Add records in order to create wildcard sub-domain
-
- Input the following information in order to create a wildcard subdomain:
- Record Type: choose URL Redirect Record from the drop-down menu
- Domain to Redirect: choose SubDomain from the drop-down menu
- Subdomain: fill in this field with a “*” symbol (or “*.sub” for *.sub.domain.com record)
- URL Look: choose Both http:// and http://www, Only http:// or Only http://www depending on your need
- Destination URL: URL where domain should be forwarded
- Redirect Type: choose Unmasked, Masked or Permanent (301) depending on your needs (you may find the difference here)
- Record Name: here you can name the record as you wish
- NOTE: Catch-all subdomains feature can be set up for all host records (NOT ONLY for URL-redirect as shown in the example above). Depending on the record you need to set up please choose corresponding record type from the drop-down menu.
- Input the following information in order to create a wildcard subdomain:

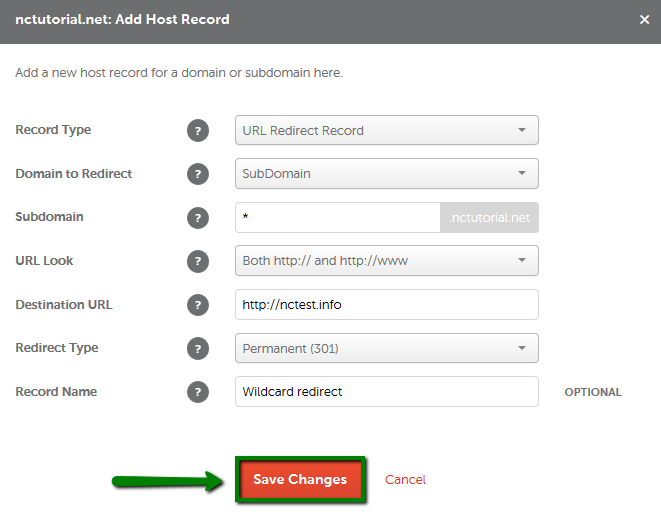
- Click Save changes
If your domain is managed by Goddady.com, please follow these steps
- Log in to your Account Manager.
- Next to Domains, click Manage.
- Click the domain name you want to use, and then select the DNS Zone File tab.
- Click Add Record for the domain name you want to update.
- From the Record type list, select A (Host).
- Complete the following fields:
- Host Name — Type *.
- Points to IP Address — Enter the IP address your domain name uses for this host record. For example, you can enter the same IP address you have for the @ record.
- TTL — Select how long the server should cache the information.
- Click Save.
- Click Save Changes
Server Configuration